|
After you created a menu you can archive it. To do this you create - with the help of the Export Wizard - a ZIP file with all slide shows and images used.
| 1. | Load or create a new SlideShow-Manager menu.
Click on the entry "Project" in the project tree on the left side of the SlideShow-Manager window. |
| 2. | Click on the tab "PC menu". Here you define the settings for the export.
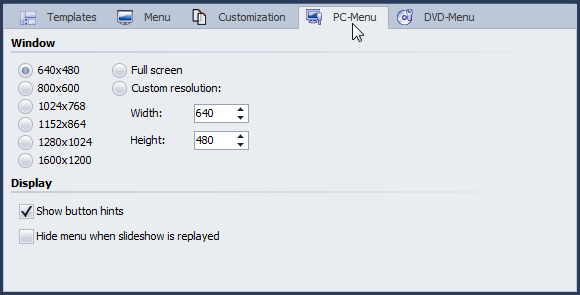 |
| 3. | In the area "Window" select one of the pre-defines resolutions or type in the width and height of your choice.
The finished menu will later be replayed in the resolution you defined here.
Activate "Show button hints" if you wish to see hints about the functionality of a button later when moving over it with the mouse. |
| 4. | Click the  button. button. |
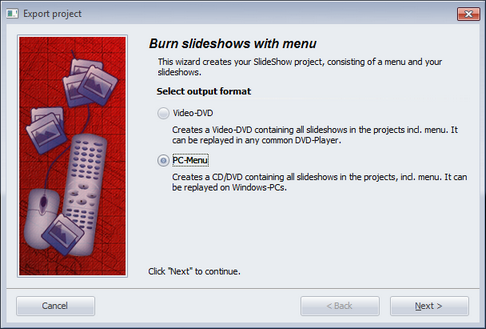
| 5. | Select the output format "PC menu" and click the "Next" button.
 |
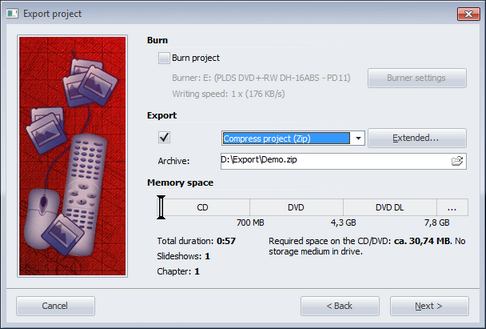
| 6. | Deactivate the check box "Burn project" and activate the check box left of the drop-down list.
Select the entry "Compress project (Zip)" from the drop-down list.
Activate the check box "with Player" if you want to copy the player for your menu in addition to your project to the ZIP file.
Activate the check box "with fonts" if you also want to copy the fonts that your templates are using to the ZIP file.
Specify a target file and click "Next".
 |
| 7. | SlideShow-Manager is now ready for the export. Click the "Export project" button. |
| 8. | Click "OK" after the export has been completed. |
|


